Home » Banana Chia Pudding
This post may contain affiliate links
This easy, high protein breakfast is made with under 10 ingredients and one container, no baking, cooking or blending necessary! It couldn’t be easier, and you’re going to love it!
I bet most of you who are currently reading this have a ripe banana (or 3) sitting on your counter. Take a look, see them there? Grab one and make this pudding! I love using ripe bananas as a sweetener in many of my recipes. Bananas are a good source of fibre, and once they are ripe, they make the best sweetener! Chia pudding is one of my fave things to make because let’s face it, making breakfast every day can be a drag. Having a nutritious option at the ready will help you get your breakfast in your belly, making you feel like you are already winning at the beginning of your day.
On paper, chia pudding is one of the simplest recipes, but sometimes getting the texture right can be challenging for people. Some people blend it like my friend here. I personally don’t love my chia blended. I love that the little seeds add texture. I am ALL about texture..more on that later.
The Most Important Chia Seed Tip!
My number 1 tip for a creamy chia pudding is in the whisking! I whisk my chia pudding for several minutes TWICE before I place it in the fridge to set.
Whisking your chia pudding will help to activate the seeds for a creamier pudding. It will also cut down your fridge time by half. If you don’t activate your seeds well, the result will be runny. Not a good pudding experience.
My second tip is to add Greek yogurt to the mix. Sure, you can add milk alone, but adding a thick Greek yogurt adds bulk and protein to your pudding. We all KNOW the protein police will be happy to hear that!
Just a handful of ingredients and 10 minutes prep for the perfect healthy breakfast! Here’s what you’ll need:
This recipe couldn’t be simpler, but a few small techniques make the difference between a runny chia pudding and the perfect creamy consistency!
Place your ripe banana into a glass container with a lid, like these ones. Using a fork, mash it thoroughly until mostly smooth. A few small lumps are perfectly fine; they’ll add texture and character.
In the same container, it’s now time to stir in the Greek yogurt, vanilla and a bit of salt. Mix until everything is combined.
Add the chia seeds and stir well so they are evenly distributed. This step is important because if you don’t mix it, you’ll have clumps, and you don’t want those. You want the chia seeds evenly distributed in the mixture
Pour in the milk and whisk for about 2–3 minutes. You’ll notice the mixture starting to thicken slightly as the chia seeds start to absorb the liquid. Let the mixture sit for about 2 minutes, and then whisk again for another 2–3 minutes. This second whisking step is key because you’re helping activate the chia seeds so they hydrate evenly and create a truly irresistible texture.
Cover the container with a lid and place it in the fridge for at least 2 hours. Overnight is better if you ask me. There’s a huge satisfaction in waking up in the morning, knowing you have a delicious breakfast waiting for you in the fridge!
If you haven’t noticed, I have a few chia pudding recipes on my site, and there’s a reason for that. They are versatile. You can pretty much add anything to them, and they will taste good. Think…
One of the things I love about chia pudding is that it keeps well in the fridge for up to five days! It’s the perfect breakfast meal prep because you can enjoy it all week long. If you make your puddings in containers like this one, you’ve already got the sealed lid included. Otherwise, ensure you have it in a container that can be closed airtight.
Dress it up however you’d like! Straight from the container, no toppings or add fruit, granola, nuts or seeds to take it up a notch. You could also enjoy this as an afternoon snack, post workout meal or as dessert, depending on what you add to it! If the pudding thickens too much overnight, simply stir in a splash of milk to loosen it.
Why didn’t my chia pudding thicken? This is the most common chia pudding issue. Usually, the problem comes down to insufficient whisking or not enough time to hydrate the seeds. Chia seeds need time and movement to absorb liquid properly.
My biggest tip: whisk twice before refrigerating. This activates the seeds and prevents clumping. If your pudding is still thin, simply stir in another tablespoon of chia seeds and allow it to sit for another hour.
What are the best chia pudding jars? Glass jars with airtight lids work best. These ones are my favourite for when I am making a large batch. They’re durable, easy to clean, and perfect for storing chia pudding for several days. They also make it easy to portion your pudding into grab-and-go breakfasts.
If you love this banana chia pudding recipe, there are plenty of other delicious variations to explore. Don’t forget to leave a rating and review if you make this recipe or have a question!
Food Photographer and Recipe Developer based in Toronto, Canada.
Join my mailing list!
*Macros are provided as an estimate for convenience. Your final numbers will vary depending on ingredient brands, substitutions, and how you portion the recipe.
Join my mailing list and be the first to get my recipes, discounts to brands I love and more! I promise not to spam you.
2 Responses
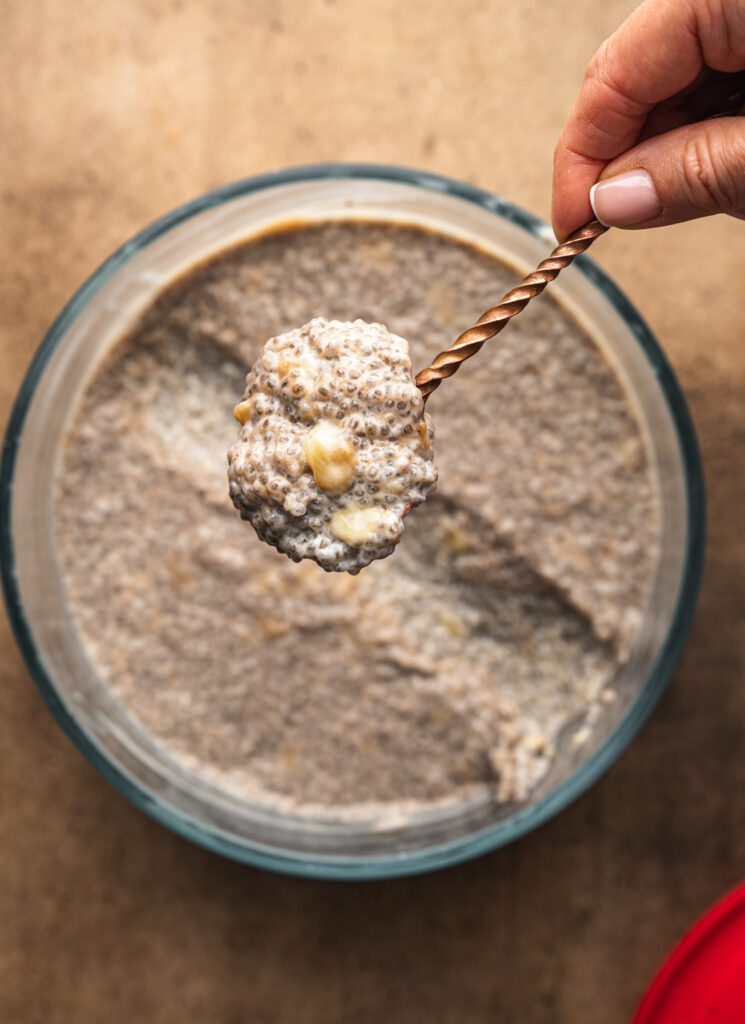
Recent studies have shown that to obtain nutritional benefit from the chia seeds (other than fibre) you need to grind them (quick blast in a coffee grinder works) to a powder to access the omega 3 inside. The seeds have a protective shell that won’t break down in the chia pudding or passing through a human body – which is great for fibre needs but means you’re not accessing the inside goodness of the seeds. Same for flaxseeds.
I grind my flax all the time! Some people (me) really don’t love the texture of ground chia. You do you 🙂
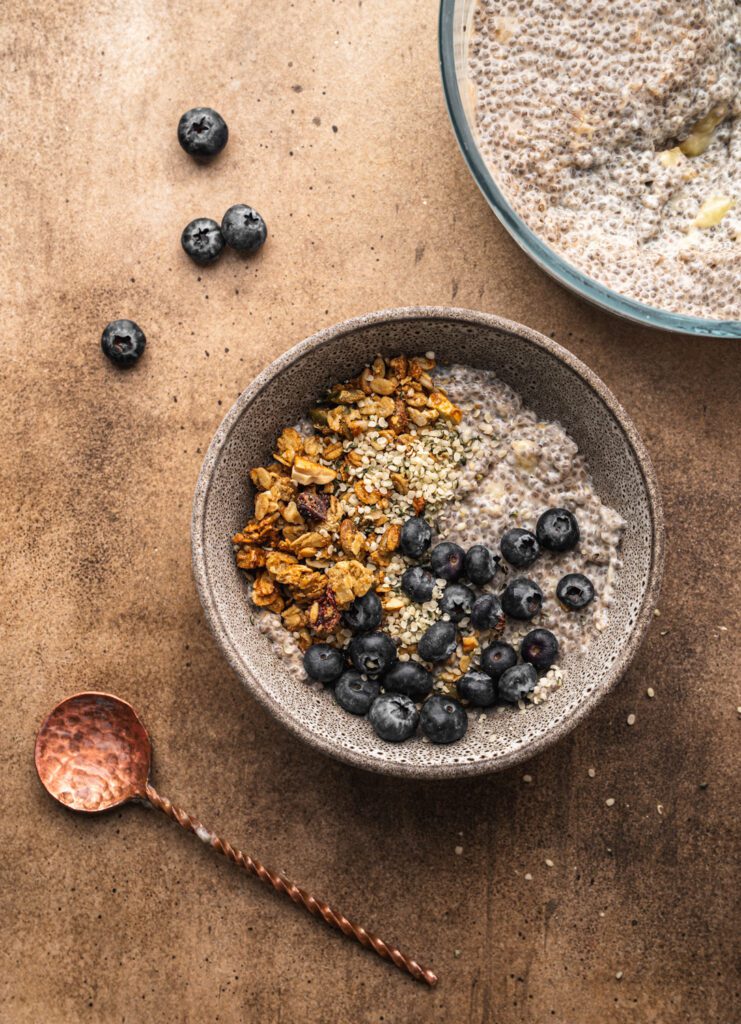