Search
Close this search box.

Strawberry Cheesecake Cups

These Strawberry Cheesecake Cups are so cute, delicious and a pleasure to share with those you love!

I am pretty sure this is my last strawberry recipe for this summer season but don’t hold me to anything as I clearly can’t be trusted. 

These Strawberry Cheesecake Cups could easily be swapped for bars if you prefer bars. My favourite thing about this recipe is the strawberry chia layer, the fact that they are vegan, gluten free, and are made without any refined sugar! However; you might want to keep it a secret how healthy these babies actually are! 

I am also positive this recipe could easily be done with raspberries or blueberries as we start to shift away from in strawberry season. 

Let’s dig in and make some Strawberry Cheesecake Cups!
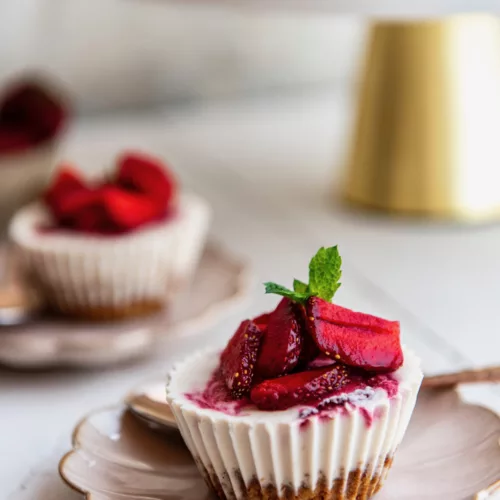
strawberry cheesecake cups on a decorative plate

Strawberry Cheesecake Cups

Teri-Ann Carty
These Strawberry Cheesecake Cups are so cute, delicious and a pleasure to share with those you love! Best is that they are vegan and refined sugar free
Prep Time 12 hours
Cook Time 4 hours
Course Desserts & Sweets

Equipment

  • food processor or blender
  • oven
  • freezer

Ingredients
  

CRUST INGREDIENTS

  • 1 cup oats
  • ½ cup raw almonds
  • ½ cup graham wafer crumbs
  • ¼ tsp salt
  • 2 tbsp maple syrup
  • ¼ cup coconut oil

FILLING INGREDIENTS

  • ½ cup cashews soaked overnight
  • ¾ cup coconut cream
  • 1 tsp vanilla
  • 2 tbsp lemon juice
  • tsp salt
  • 1 tbsp arrowroot starch
  • 2 cups fresh strawberries

TOPPING INGREDIENTS

  • cups sliced strawberries
  • 1 heaping tsp arrowroot starch
  • 2 tbsp chia seeds

Instructions
 

CRUST INSTRUCTIONS

  • Preheat the oven to 350 degrees.
  • Place oats, almonds and graham wafer crumbs into a food processor and pulse to combine. Add remaining ingredients and pulse to come together. The crust should pinch in between your fingers.
  • Line a muffin tin with silicone cupcake holders and firmly press a heaping tbsp into the bottom of each cup.
  • Bake for 15-20 minutes.
  • Set aside to cool.

FILLING INSTRUCTIONS

  • Place all the filling ingredients into a high-speed blender and blend on high until smooth and creamy.
  • Scrape down sides as needed. Pour mixture over the crusts and fill up 3/4 of the way to the top. There should still be 1/2-3/4c of the cheese cake filling left over.
  • Tap to release any air bubbles and place in the freezer for 25 minutes.
  • Make the topping.

TOPPING INSTRUCTIONS

  • In the same blender add the topping ingredients.
  • Blend on high, scrape down the sides and blend again.

ASSEMBLY INSTRUCTIONS

  • After 25 minutes the middle layer should be soft and pliable but not runny. If it is too liquidy, place it back in the freezer.
  • Use a spoon to scoop the strawberry topping into the middle of the cheesecake layer.
  • Use a toothpick to swirl and make designs.
  • Place back in the freezer to firm up for 3-4 hours.
  • Once set, remove the silicone cup and leave at room temperature for 15 minutes.
  • Slice up some strawberries and fresh mint to place on top of each cup.
  • Leftovers keep well in the freezer without the fresh strawberries.
Keyword baked, cheesecake, dairy free, gluten free, no bake, plant based, raw, refined sugar free, vegan

Leave a Reply

Your email address will not be published. Required fields are marked *

SUBSCRIBE!

Join my mailing list and be the first to get my recipes, discounts to brands I love and more! I promise not to spam you.